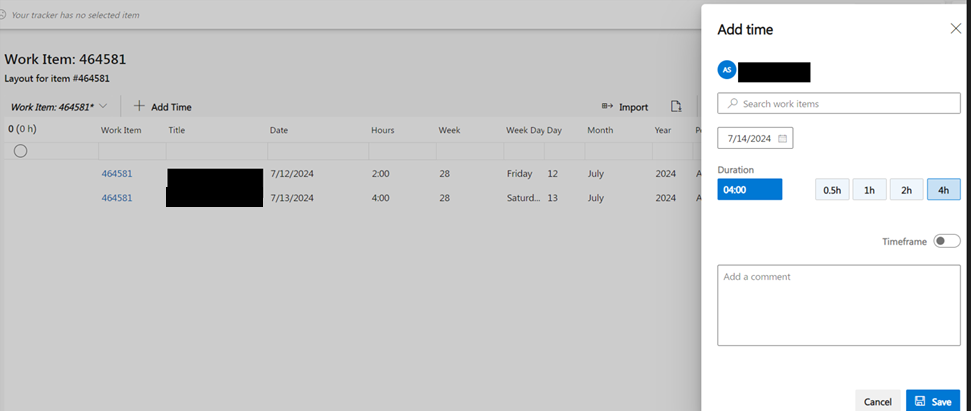
Go to a task in AzDo
Click on the "7 pace" tab
click the calendar icon to show the detail for this workitem
Then click Add time
Then pick the date
Pick the time interval
Click Save
Expected: Time is recorded against the workitem
Actual: Error is shown indicating the workitem needs to be identified.
I launched the Add Time dialog from the workitem. It is mentioned multiple times on the screen where I click the Add Time button. It should remember this.

This was originally reported under support request 60883, and I was informed this would be forwarded to the product team but I could not find a similar report on either the Feature Requests or Issue Reports here on this site.
-
Hello Andrew,
When you navigate to the Times Explorer from the "7pace" tab within a work item, the system doesn't retain the link to the specific work item in the "Add Time" dialog. While this behavior is by design—since Times Explorer is a general view where multiple work items can be managed—we understand that it may cause confusion, as the work item details are prominently displayed before opening the dialog.
To address your feedback, we’ve forwarded this observation to our Product Owner under the mentioned ticket #60883 for review.
In the meantime, we would recommend trying out the Weekly feature in Timetracker, which can offer some added functionality and improve your workflow. Weekly view has a copy feature, which allows you to copy worklogs. However, at this point, you’ll need to manually adjust the length of the copied worklog. The good news is that we have plans to enhance this in the future with a full copy feature, which will make the process even more efficient.
Here’s how you can enable the Weekly feature:1. Navigate to the Timetracker Monthly page.
2. Open your browser's Console:
- Chrome/Edge: Right-click on the page, choose Inspect, and then click on the Console tab.
- Firefox: Right-click on the page, choose Inspect Element, and then click on the Console tab.
- Safari: Enable the developer menu first in Preferences > Advanced, then right-click and select Inspect Element to access the Console.
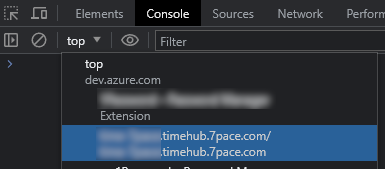
3. Switch to the Timetracker iframe (as shown below).

4. Execute the following code in the Console:
TimetrackerBaseInstance.setExtensionFeatureWeekly(1);
5. Reload the page, and the Weekly feature should now be enabled and seen in the interface.
Best regards,Maciej SzczęsnyTechnical Support Engineer -
@Maciej - When I try to enable the weekly feature to see what it is/does, I get a PATCH 403 forbidden error.
The URL mentioned in the console is `https://dev.azure.com/<my org name>/_apis/FeatureManagement/FeatureStates/host/7pace.Timetracker.weeklyExtensionVisibleForUser?api-version=4.1-preview`
I dont really need to copy weeks, I wrote a Powershell script that will create entries for my recurring tasks and meetings. I described what that involves and the types of scenarios I would need in a comment on the feature request that seemed closest to what I think I need for that. https://support.7pace.com/hc/en-us/community/posts/360050432092/comments/21496234161426
Please sign in to leave a comment.

Comments
2 comments